Gearing Up to Garden 3
Many of you have a gardening season that starts much earlier than ours. For that reason, I'm going to re-visit some posts from the past about starting seedlings, preparing the soil and more. I hope you find them to be useful!
Let's Get to Planting!
Originally published March 14, 2009
Now that we've got the pots made, lets get some seeds started!
If you are using 'potting soil' (that's what I am using), it is often very dry. Put it in the bin/bucket/container and add a good amount of water. Then, wait an hour or more. The soil will re-hydrate and make this whole process much easier. If you start with bone-dry soil, it 'bubbles up' when you start to water it, and sometimes your seeds will float to the top!
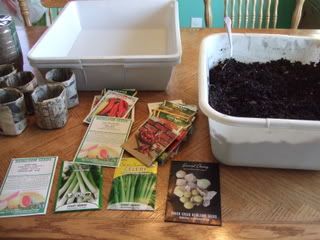
Once your soil is ready to go, gather all the stuff...pots, seeds, dirt, trays, sharpie...
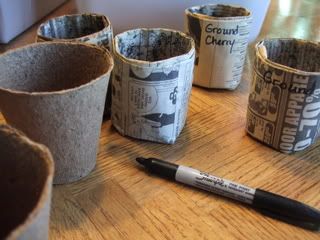
I used to write the names of the seedlings on popsicle sticks, then put them in the starter pots from day one. Little Bit loves to move those around, so they don't really work anymore. (oh well!) Now I just write the name of the item right on the pot. We found some 'jiffy' pots out in the shed, so we're using those up too.
I like to group the pots with the seed packets, so that I make sure I get all of the same variety planted at once. That's just how I do it - you do it how you like!

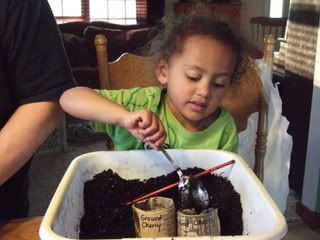
Fill the pot with soil.
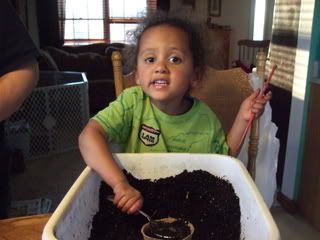
Use the chopstick to make a hole the proper depth for the seeds, then plant them! (My goodness, I think she's going to be a teacher!)
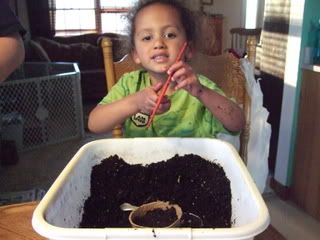
Repeat, repeat, repeat.
You'll notice as you pack the paper pots that they sit better than they did when they are empty. Neat, eh? As you get each pot filled and planted, put it into a tray that holds water. We found kitty litter trays one year on clearance - they work really well and fit the space we have available. Another option is a plastic 'shoe box' or under-bed height storage box. This outer box does a few things - it makes them easy to water, easy to move or turn to get optimum sunlight, and easy to keep together.
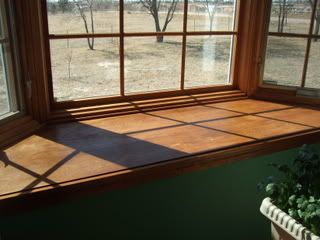
Find a nice sunny window and clear away a winter's worth of clutter.
Once they are all planted and set into the trays, spritz them with water if they need it. I have better luck with a spray bottle full of water than I do with a watering can, but maybe that's just me. We live in a really dry climate, so I cover the trays with a loose layer of plastic wrap. This is just during germination, to help keep the soil moist and warm. Once the seedlings have started, remove the plastic so your seedlings get all the air they need.

Happy growing!
Linked to Farm Friend Friday
Let's Get to Planting!
Originally published March 14, 2009
Now that we've got the pots made, lets get some seeds started!
If you are using 'potting soil' (that's what I am using), it is often very dry. Put it in the bin/bucket/container and add a good amount of water. Then, wait an hour or more. The soil will re-hydrate and make this whole process much easier. If you start with bone-dry soil, it 'bubbles up' when you start to water it, and sometimes your seeds will float to the top!
Once your soil is ready to go, gather all the stuff...pots, seeds, dirt, trays, sharpie...

I used to write the names of the seedlings on popsicle sticks, then put them in the starter pots from day one. Little Bit loves to move those around, so they don't really work anymore. (oh well!) Now I just write the name of the item right on the pot. We found some 'jiffy' pots out in the shed, so we're using those up too.

I like to group the pots with the seed packets, so that I make sure I get all of the same variety planted at once. That's just how I do it - you do it how you like!

Fill the pot with soil.

Use the chopstick to make a hole the proper depth for the seeds, then plant them! (My goodness, I think she's going to be a teacher!)

Repeat, repeat, repeat.

You'll notice as you pack the paper pots that they sit better than they did when they are empty. Neat, eh? As you get each pot filled and planted, put it into a tray that holds water. We found kitty litter trays one year on clearance - they work really well and fit the space we have available. Another option is a plastic 'shoe box' or under-bed height storage box. This outer box does a few things - it makes them easy to water, easy to move or turn to get optimum sunlight, and easy to keep together.
Find a nice sunny window and clear away a winter's worth of clutter.

Once they are all planted and set into the trays, spritz them with water if they need it. I have better luck with a spray bottle full of water than I do with a watering can, but maybe that's just me. We live in a really dry climate, so I cover the trays with a loose layer of plastic wrap. This is just during germination, to help keep the soil moist and warm. Once the seedlings have started, remove the plastic so your seedlings get all the air they need.

Happy growing!
Linked to Farm Friend Friday

Comments