I really don't sew.
It's sort of embarrassing to be a person with a Home Economics degree who doesn't sew. I mean, sure, I sew stuff, and I even had to take a 100-level course in sewing in college, and I got an A in it, but truth be told, about 90% of the time, I'm not really sure what I'm doing. The other 10% I'm threading the machine. For some reason, I have that figured out. I can even do bobbins!
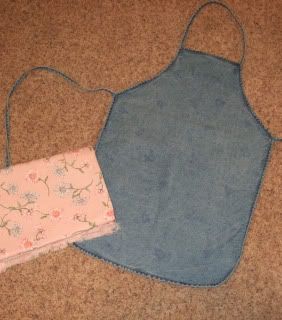
I've been wanting an apron with a big ol' pocket that I can use for clothespins when I'm hanging out laundry. That way I don't have to run back and forth to the clothespin bag for more pins all the time. It's windy here most days, so I hang it up by the post because it will fall off the line sometimes.
Anyway...I already had this cute little denim apron that I stamped with flowers a long time ago - they've faded, so I'll use it, and just add a pocket made of that cute yard sale fabric. It's a cotton twill, so it should be sturdy enough.
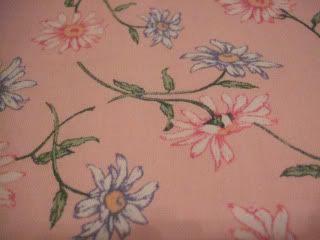
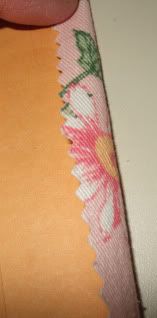
Close-up on the fabric - isn't it pretty?
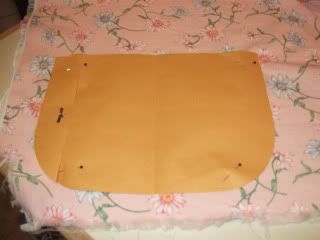
Since the edges of the apron are curved, I'm going to make a curved pocket too. I made my pattern from an old manila envelope that is too worn out to use again.
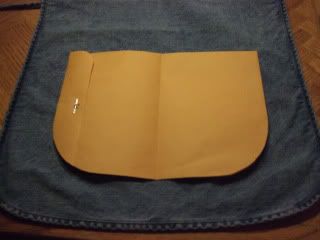
I even pinned it to the fabric before I started cutting! People who actually sew do stuff like that. (I usually don't, but I wanted this to turn out right.)
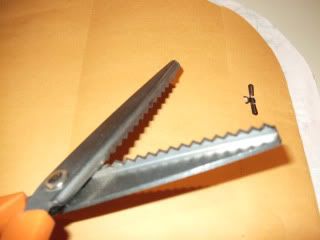
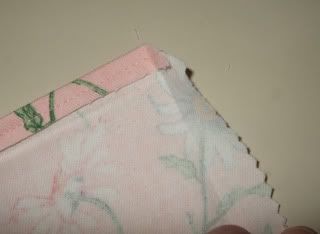
All cut out and ready to go! I used pinking shears (the ones that look like zig-zag) so that I won't have to deal with a bunch of ravelly stuff later.

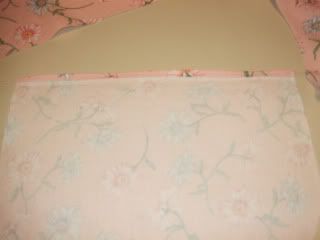
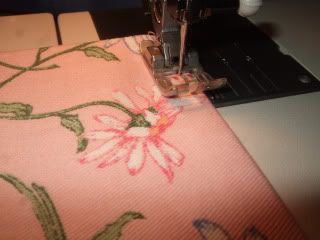
I folded over the top of the pocket and stitched it, fairly close to the edge, as I want to do this again so it's more finished.
Then I used the pattern as a guide, turned under all the edges and pressed them, with the iron.
On the curves I made some snips on the inside of the seam, and then at the top, there was a lot of bulk, so I cut out triangular pieces to make it less bulky.
Now I can fold the top down a second time on that pressed 'line' and stitch it again, so there are no edges on the top to fray.
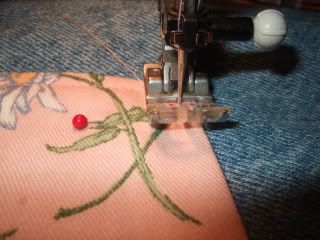
Next I lined it up where I wanted it on top of the apron...then, again, looking like a show-off, I pinned it in place! I left it slightly 'loose' along that top, so it's easy to get in and out grabbing those clothespins. Looking back, I'm pretty sure that wasn't necessary, but it didn't ruin it either.


I have all these pins with different color heads. I bet the colors mean something...like 'put buttonhole here' or 'dart ahead' or 'double stitch this area'...but I just pick out the ones that are close. I don't know the code.
I do know that when you're sewing, and a pin is coming close to the needle, take the pin out! Those pins LOVE to break needles. It's a feud that's been doing on for millenia.
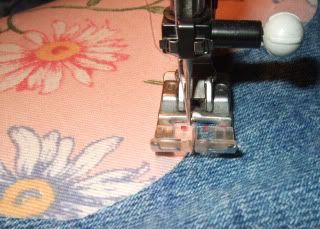
Aaack! Curves! I go very, very slow on curves.
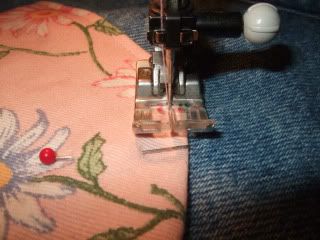
I got the stitching done all around the edge, and decided to do it again. Second verse, same as the first.
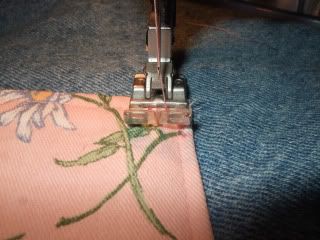
Not bad! It's actually really even all the way around.
This machine actually has the ability to sew 'double needle', but I would have had to find the book and read several pages just to figure out the setup, so I just went slow and used the single needle.
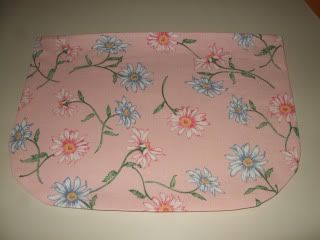
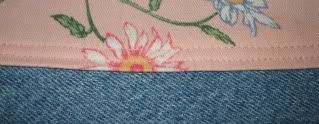
The pocket is ON! It's even straight! WOW! But...the apron 'needs' something, so back to that manila envelope...
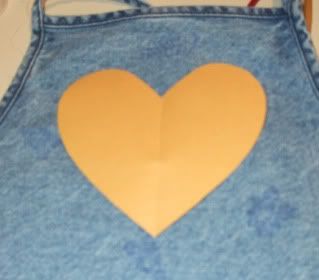
Before I cut this out, I ironed on some 'Wonder Under' fusible 2-sided sticky webbing stuff.

You iron it on, cut out the thingy, then peel off the paper backing, put it where you want it, iron it again, and it sticks!!
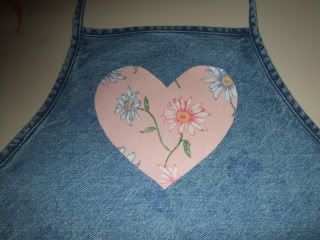
Then, you zig-zag stitch the edges to catch them, and to keep it in place.
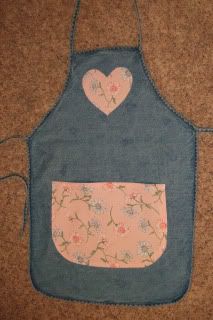
Ta-daaa! Not bad for someone who doesn't sew!
I've been wanting an apron with a big ol' pocket that I can use for clothespins when I'm hanging out laundry. That way I don't have to run back and forth to the clothespin bag for more pins all the time. It's windy here most days, so I hang it up by the post because it will fall off the line sometimes.
Anyway...I already had this cute little denim apron that I stamped with flowers a long time ago - they've faded, so I'll use it, and just add a pocket made of that cute yard sale fabric. It's a cotton twill, so it should be sturdy enough.

Close-up on the fabric - isn't it pretty?

Since the edges of the apron are curved, I'm going to make a curved pocket too. I made my pattern from an old manila envelope that is too worn out to use again.

I even pinned it to the fabric before I started cutting! People who actually sew do stuff like that. (I usually don't, but I wanted this to turn out right.)

All cut out and ready to go! I used pinking shears (the ones that look like zig-zag) so that I won't have to deal with a bunch of ravelly stuff later.


I folded over the top of the pocket and stitched it, fairly close to the edge, as I want to do this again so it's more finished.

Then I used the pattern as a guide, turned under all the edges and pressed them, with the iron.

On the curves I made some snips on the inside of the seam, and then at the top, there was a lot of bulk, so I cut out triangular pieces to make it less bulky.


Now I can fold the top down a second time on that pressed 'line' and stitch it again, so there are no edges on the top to fray.

Next I lined it up where I wanted it on top of the apron...then, again, looking like a show-off, I pinned it in place! I left it slightly 'loose' along that top, so it's easy to get in and out grabbing those clothespins. Looking back, I'm pretty sure that wasn't necessary, but it didn't ruin it either.


I have all these pins with different color heads. I bet the colors mean something...like 'put buttonhole here' or 'dart ahead' or 'double stitch this area'...but I just pick out the ones that are close. I don't know the code.
I do know that when you're sewing, and a pin is coming close to the needle, take the pin out! Those pins LOVE to break needles. It's a feud that's been doing on for millenia.

Aaack! Curves! I go very, very slow on curves.

I got the stitching done all around the edge, and decided to do it again. Second verse, same as the first.

Not bad! It's actually really even all the way around.

This machine actually has the ability to sew 'double needle', but I would have had to find the book and read several pages just to figure out the setup, so I just went slow and used the single needle.
The pocket is ON! It's even straight! WOW! But...the apron 'needs' something, so back to that manila envelope...

Before I cut this out, I ironed on some 'Wonder Under' fusible 2-sided sticky webbing stuff.

You iron it on, cut out the thingy, then peel off the paper backing, put it where you want it, iron it again, and it sticks!!

Then, you zig-zag stitch the edges to catch them, and to keep it in place.

Ta-daaa! Not bad for someone who doesn't sew!


Comments